Cat Slicker Brush with Negative Ions: Less Static, Less Shed
Calmer Coat Care with a Slicker Brush and Negative-Ion Support
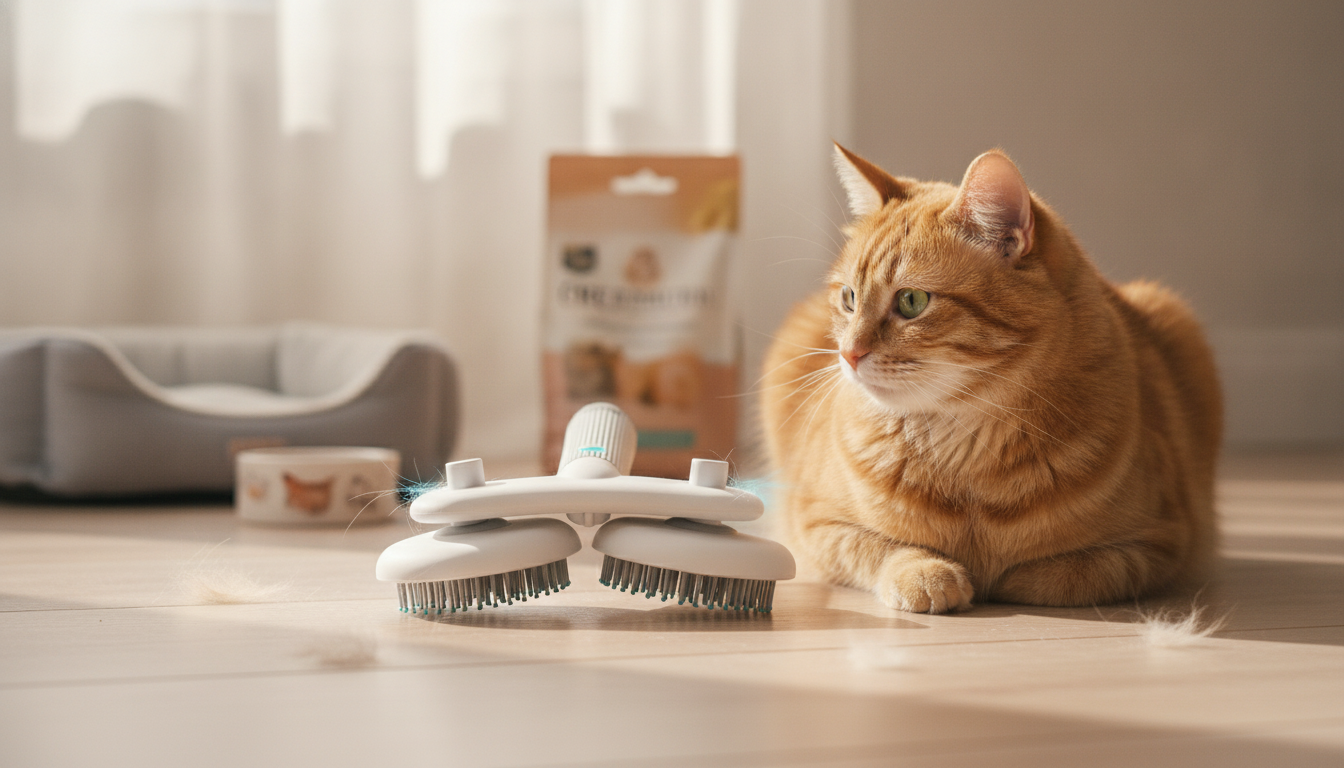
A good grooming routine keeps loose hair under control, supports healthy skin, and can make coat care faster and calmer. This slicker brush pairs fine pins for de-shedding with a negative-ion feature designed to help reduce static and leave the coat feeling smoother after brushing. If shedding “tumbleweeds” show up overnight or your cat’s coat gets clingy in dry air, the right tool—and the right technique—can make a noticeable difference.
What This Slicker Brush Is Designed to Do
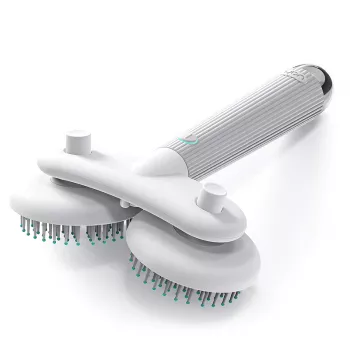
A slicker brush is built to grab loose hair efficiently while staying maneuverable around a cat’s curves and sensitive zones. This style is especially useful when you want everyday control without the intensity of more aggressive undercoat tools.
- Lift and collect loose undercoat and surface shedding before it ends up on floors and furniture
- Help detangle light-to-moderate knots while keeping sessions comfortable and controlled
- Support a smoother finish by reducing static and flyaways during brushing
- Make regular coat care easier for both short-haired and long-haired cats
If you’re shopping specifically for shedding control plus a smoother, less “puffy” finish in dry conditions, take a look at the Cat Grooming Slicker Brush with Negative Ions for Shedding & Grooming.
Why Negative Ions Matter During Brushing
Static isn’t just annoying; it can make fur cling to the brush, to your hands, and back onto the coat. When coats are dry (winter heating, air conditioning, low humidity), brushing friction can increase that charge and make grooming feel messy or less controlled.
- Static control: dry air and friction can make fur puff up and cling; negative-ion output is often used to reduce static buildup
- Smoother feel: less static can help the brush glide more consistently, especially on finer coats
- Neater results: reduced flyaways can make collected fur easier to manage during and after grooming
- Best paired with technique: gentle strokes and sectioning coat areas improve results more than force
Keep expectations realistic: negative ions can support a smoother brushing experience, but comfort still comes mainly from light pressure, good timing, and not overworking one spot.
Coat Types and Situations Where It Helps Most
Some cats only need occasional brushing, while others benefit from short, frequent sessions. A slicker brush with static-reducing support tends to shine in these common scenarios:
- Seasonal shedding periods when loose hair increases noticeably
- Medium-to-long coats that mat easily around the ruff, armpits, belly, and behind the ears
- Indoor cats that groom frequently and may swallow more loose hair
- Multi-cat homes where reducing airborne fur and “tumbleweeds” is a constant goal
Regular brushing can also complement other basics of cat care. For broader grooming guidance, the ASPCA’s cat grooming tips are a helpful reference.
How to Brush for Comfortable, Effective De-shedding
The goal is to collect loose hair without scraping the skin. Cats often tolerate grooming best when it’s predictable, brief, and gentle—especially at the start.
- Start with short sessions (2–5 minutes) and build up as tolerance improves
- Brush in the direction of hair growth using light pressure; let the pins do the work
- Work in small sections: shoulders, back, sides, haunches, and tail base; avoid repeated passes over one spot
- Use extra care on sensitive areas (belly, inner legs, under the collar line); switch to fewer strokes and gentler pressure
- If a tangle resists, stop and separate with fingers; do not yank—mats may need a comb, detangler, or professional help
- Finish with a calming cue (treat, play, or a quiet rest) to make grooming predictable
Quick Brushing Plan by Coat Length
| Coat type | Frequency | Session length | Focus areas |
|---|---|---|---|
| Short hair | 2–3x per week | 3–8 minutes | Back, sides, tail base |
| Medium hair | 3–5x per week | 5–10 minutes | Ruff, belly edges, behind ears |
| Long hair | Daily or near-daily | 5–15 minutes | Armpits, pantaloons, underside, collar line |
Comfort and Safety Tips for Sensitive Skin
Slicker pins are effective, but they can irritate skin if used with heavy pressure or repeated strokes in the same area. For cats with thin coats, sensitive skin, or grooming anxiety, small adjustments go a long way.
If skin problems or itching persist, it’s worth reviewing general health guidance from a trusted source such as the American Veterinary Medical Association (AVMA) cat care resources.
Cleaning and Maintenance for Better Performance
Maintenance Checklist
| Task | How often | Why it helps |
|---|---|---|
| Pull off collected fur | After each session | Improves de-shedding and reduces tugging |
| Wipe pins/head | Weekly | Removes oils and dander that reduce grip |
| Inspect for bent pins | Monthly | Prevents scratching and uneven grooming |
| Check power/battery (if applicable) | As needed | Keeps ion feature consistent |
How It Compares to Other Common Cat Brushes
For cats that struggle with hairballs, reducing loose hair in the coat can help. Cornell’s overview on hairballs in cats explains why swallowed fur builds up and when symptoms may need attention.
Featured Finds in Stock
- Cat Grooming Slicker Brush with Negative Ions for Shedding & Grooming
- Off-White Cotton Script Skate Hoodie
FAQ
Can a slicker brush help reduce hairballs?
Yes—by removing loose hair before your cat swallows it during self-grooming. Hairballs can still happen, and ongoing vomiting, appetite changes, or lethargy should be discussed with a veterinarian.
How often should a cat be brushed during shedding season?
Most short-haired cats do well with 2–3 sessions per week, while medium-to-long coats often benefit from 3–5 sessions or even daily quick brushing. Short, frequent sessions are usually better tolerated than long sessions that cause irritation or stress.
Is a slicker brush safe for cats with sensitive skin?
It can be safe when used with gentle pressure and limited passes over each area. Avoid brushing over inflamed skin, wounds, or tight mats, and stop if you notice redness that doesn’t quickly resolve.


Leave a comment